In this article I will go through the steps required to implement RADIUS authentication using Windows NPS (Network Policy Server) so that firewall administrators can log-on using domain credentials.
My Setup
- Palo Alto running PAN-OS 7.0.X
- Windows Server 2012 R2 with the NPS Role – should be very similar if not the same on Server 2008 and 2008 R2 though
- I will be creating two roles – one for firewall administrators and the other for read-only service desk users.
NPS Configuration
First we will configure the NPS server.
- Create the RADIUS clients first. The clients being the Palo Alto(s). If you have multiple or a cluster of Palo’s then make sure you add all of them. You don’t want to end up in a scenario where you can’t log-in to your secondary Palo because you forgot to add it as a RADIUS client. Make a note of the generated secret key as you will need it later on.
- Next create a connection request policy if you don’t already have one. A connection request is essentially a set of conditions that define which RADIUS server will deal with the requests. In my case the requests will come in to the NPS and be dealt with locally.
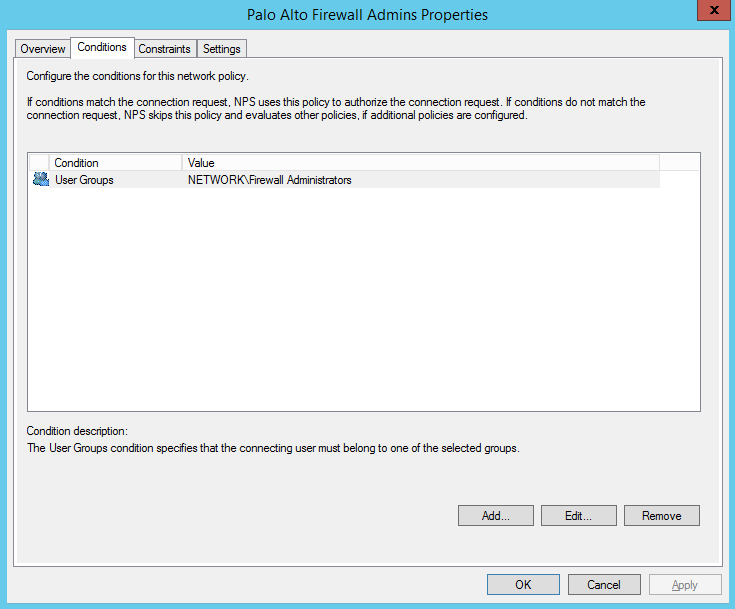
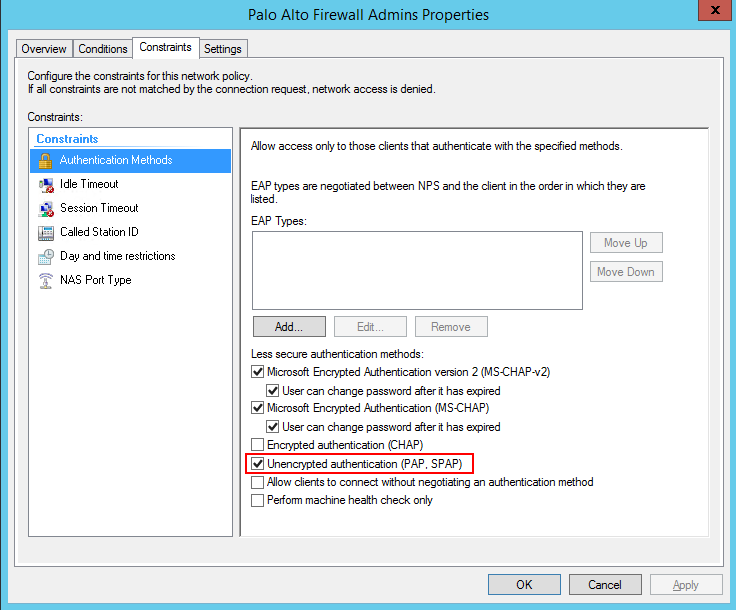
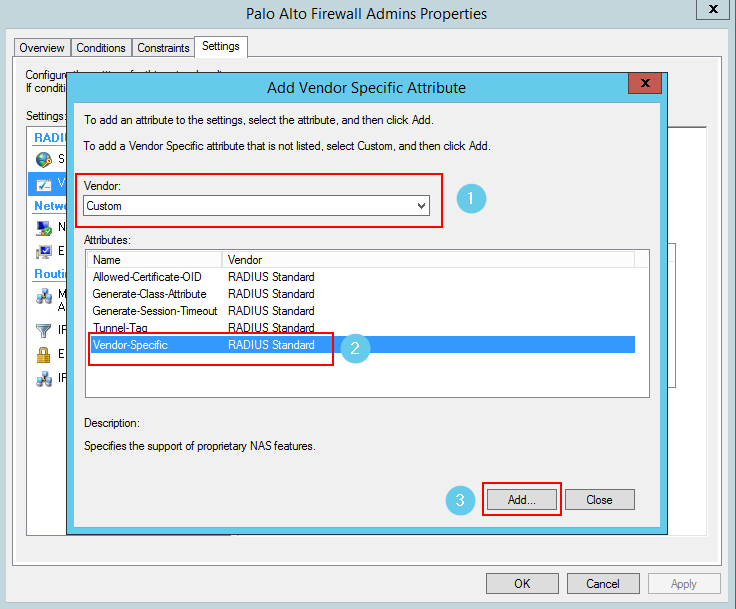
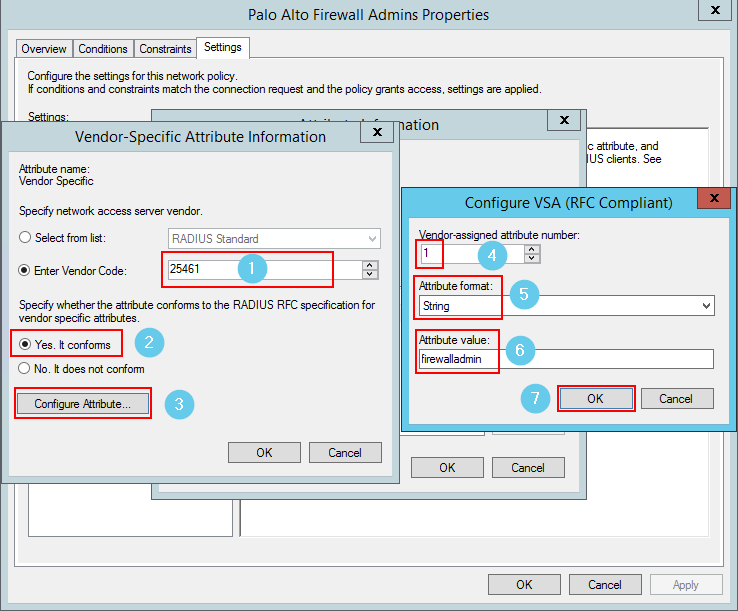
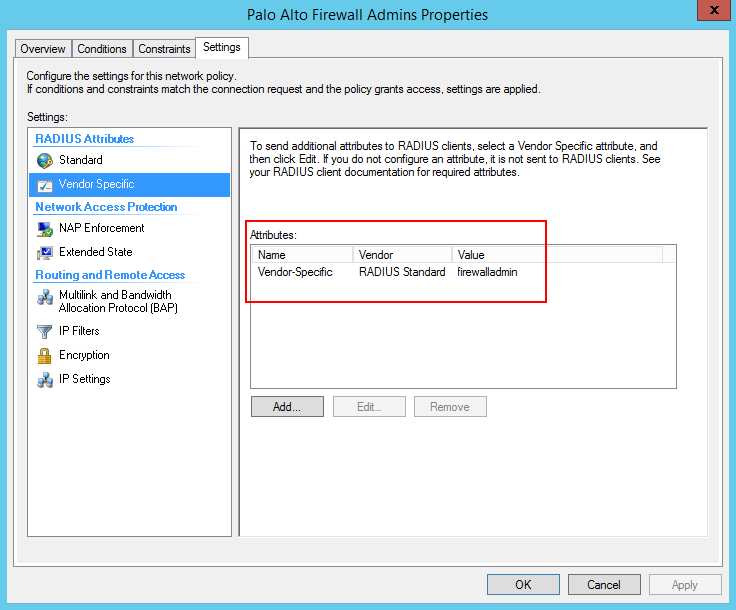
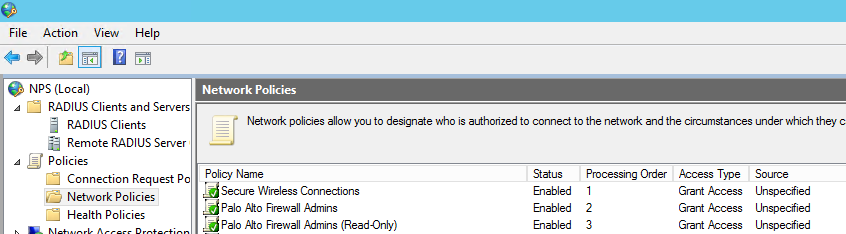
- Now we create the network policies – this is where the logic takes place.
Now let’s configure the Palo…
Palo Configuration
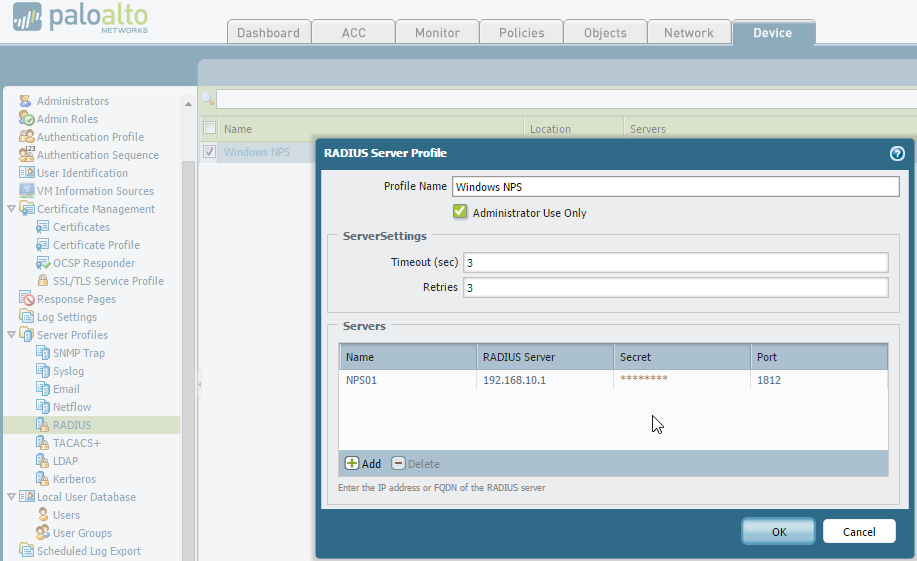
First we will configure the Palo for RADIUS authentication. This involves creating the RADIUS server settings, a new admin role (or roles in my case) and setting RADIUS as the authentication method for the device.
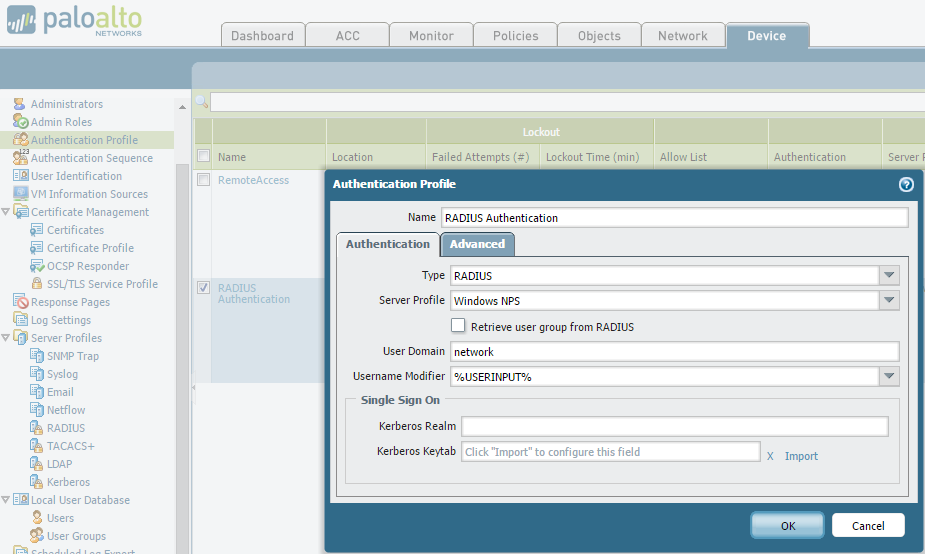
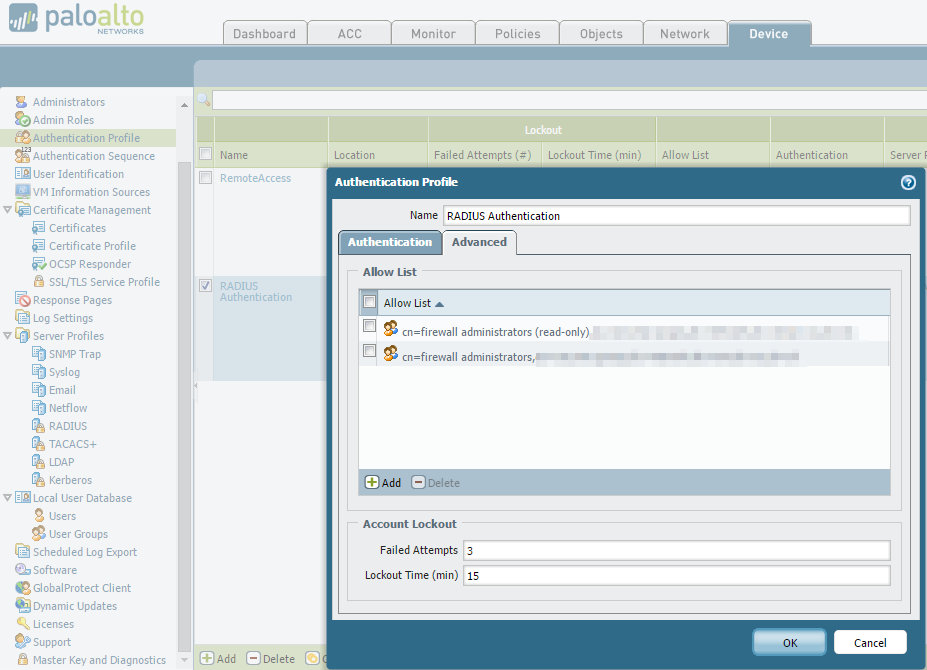

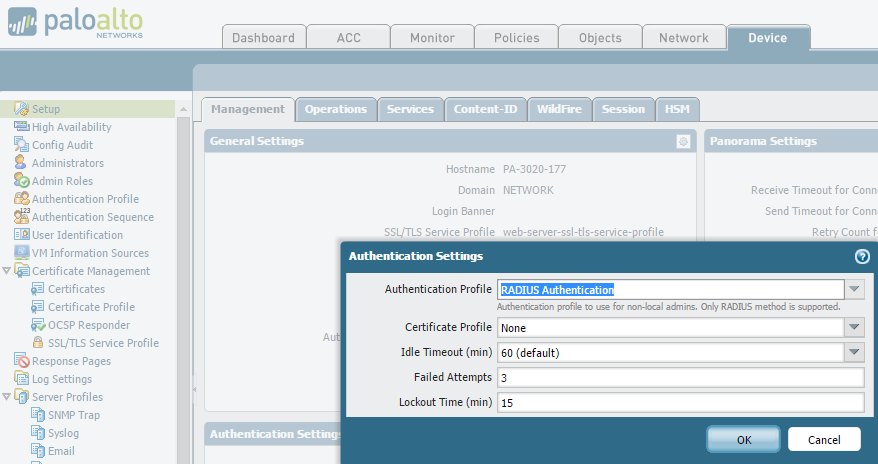
Note: Don’t forget to set the Device –> Authentication Settings –> Authentication Profile on all your Palo’s as the settings on these pages don’t sync across to peer devices.
Other tips
- It is good idea to configure RADIUS accounting to monitor all access attempts
- Change your local admin password to a strong, complex one
- Monitor your Palo system logs if you’re having problems using this filter:
[code]( eventid eq auth-success ) or ( eventid eq auth-fail )[/code]