In this article I will briefly go through instructions on installing mod_cloudflare on an Ubuntu 14.04 server running Apache 2.4.
The reason we need the mod_cloudflare module is because Cloudflare acts as a reverse proxy meaning that visitor IP addresses in your access logs (/var/log/apache2/access.log) will appear to come from any one of Cloudflare’s IP addresses; all of which they make available here.
You can quickly confirm this fact by running the following:
sudo tail -f -n 1 /var/log/apache2/access.log
Now access your site and check the request come in. Compare the IP to the Cloudflare IP range – you should see a match.
Installing mod_cloudflare – Option A
This is the lesser known but preferred solution as it doesn’t require you to install between fifty and a hundred new packages to your system – you’ll know what I’m talking about when I get to Option B.
First we need to add the official Cloudflare repository as a source in our Ubuntu set-up. For this we need to run the following:
Here we are creating a new file called cloudflare-main.list in the /etc/apt/sources.list.d directory and adding a single line to the file:
deb http://pkg.cloudflare.com/ trusty main
Here trusty is the Ubuntu release codename. Trusty = 14.04, Precise = 12.04, Utopic = 14.10 and Vivid = 15.04
echo 'deb http://pkg.cloudflare.com/ trusty main' | sudo tee /etc/apt/sources.list.d/cloudflare-main.list
Now we want to add the public GPG key for the Cloudflare repository so that apt can authenticate the packages (tip: see all keys by running apt-key list)
curl -C - https://pkg.cloudflare.com/pubkey.gpg | sudo apt-key add -
As we’ve just added the Cloudflare repo, we should update the apt cache by running:
sudo apt-get update
Now we can see all packages we can install from the Cloudflare repo:
grep ^Package: /var/lib/apt/lists/pkg.cloudflare.com_dists_trusty_main_binary-amd64_Packages
You’ll see a number of packages. The one we’re interested in is called libapache2-mod-cloudflare

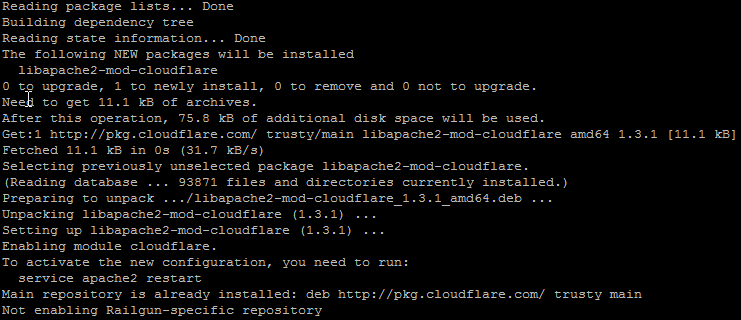
Let’s install mod_cloudflare by running the following:
sudo apt-get install libapache2-mod-cloudflare
You’ll see some output and after a few seconds, the module will automatically load
Now all that’s left is to restart Apache by running:
sudo service apache2 restart
That’s it! You can confirm the presence of the module by checking the access.log just like we did at the beginning of this blog. You can also run the command below which will spit out all active Apache modules:
sudo apache2ctl -M
Installing mod_cloudflare – Option B
The more ‘advertised’ method of installing mod_cloudflare on Ubuntu 14.04 is the one on the official Cloudflare pages. It basically involves cloning the mod_cloudflare git repo and compiling the source code in to an Apache module. This process requires many dependencies which is why I don’t like it.
First we need to install the dependencies:
sudo apt-get install apache2-dev libtool git
Now clone the git repo to a location of your choice. I put mine in /var/www/:
cd /var/www
git clone https://github.com/cloudflare/mod_cloudflare.git
cd mod_cloudflare
Now we build the Apache usable module from the source file mod_cloudflare.c:
apxs -a -i -c mod_cloudflare.c
Now all you need to do is restart Apache and confirm that the module is active by testing it!
sudo service apache2 restart
5 replies on “Installing mod_cloudflare on Ubuntu 14.04 for Apache Server”
Huge thanks this. Couldn’t get the darned thing to install without your steps. Nice and easy to follow. Kudos.
This tutorial is much more concise than the instructions on the Cloudflare support page. Thank you.
I concur. Thanks for the step-by-step instructions.
Thank you, worked like a charm 🙂
[…] Original source: https://emtunc.org/blog/01/2016/installing-mod_cloudflare-ubuntu-14-04-apache-server/ […]